


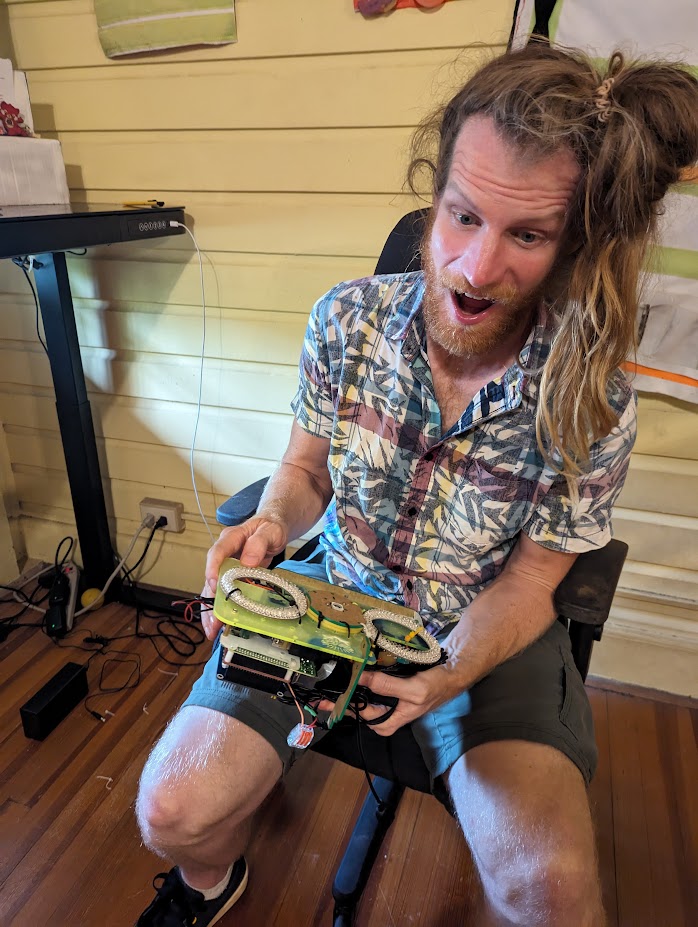
Wanted to share a final set of updates on the work we have been cranking on here in Gamboa, Panama making this inexpensive portable night insect surveyor! There's been a lot of cool wins and successes (and thankfully so, because @Hubertszcz will hopefully be deploying them in under 3 weeks!
I also just had my engineer friend from the USA (and former design business partner) Craig Durkin visit and we did a final "engineering audit" of the full system. It's always helpful to get an extra pair of eyes on a thing you crank on a design for a year like this. We uncovered a couple little tweaks that should make the whole thing a bit more robust and user friendly!
I just finished up a year end parts audit and put together an early draft of the full parts list (you can see here). All the final documentation for how to build your own will be up on github around February.
Here's a quick rundown of some of the design changes and things we did as we prepare to shift from final designs to producing 11 of these in the next couple weeks!
Power Management - Pijuice
I had previously posted about testing several raspberry pi adapters that claimed to do automated power scheduling, but many turned out to not be fully automated or off-grid to do so. These were all a bit more in the inexpensive side (~$30), but i ended up going with the reccomendation that many scientists and other scientific tool designers used reliably, the Pijuice.
Pijuice + Relay Hat?
Yes! Another win for the pijuice is that it was designed to not block many GPIO ports (unlike many other hats, including even Waveshare's own power management hat that blocks the ports from their relay hat!) So our waveshare relay hats could stack right on top of the pi and the pijuice, making for a simple to assemble electrical build for future users! Most of our electronics you just have to stack!
Endurance Test
Before I went completely all-in on the pijuice, I wanted to do a final test. I set up an endurance test for our core setup of the Pijuice+Pi+Relay+battery. I created a program that would turn the pi on, take a photo, save the photo, write a log note, turn on and off all the relays, and then shut itself down, before waking itself back up in 10 minutes. (I learned one thing NOT to do when programming startups and stops of pis is to not have automated scripts that turn it off too quickly! before I could log in and do anything else with this Pi, i first had to take out its SD card and edit the scripts on a different PI, so i would have enough time to stop the auto-script!)
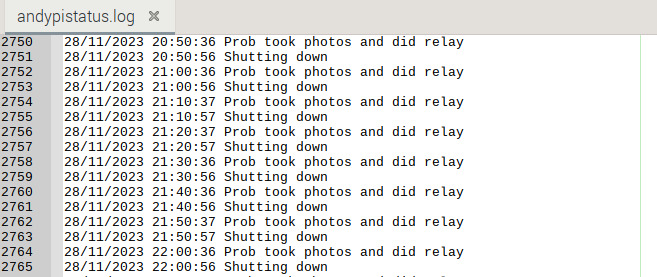
the result is that with a pi waking up and running a photo + relay script every 10 minutes, the whole contraption kept going for 179 hours (7.5 days). This was great to see from a battery perspective and just that the core parts didn't suffer any key problems!
Ordered 10 more pijuices
So after some good thorough testing the pijuice seemed great, and so we ordered 10 of them from pisupply. The main problem with the pijuice for us, is that compared to other things we can find on amazon or ebay, the pijuices cost about $50 to ship (and the devices themselves are around $58). We talked to the nice people at pisupply though and the were able to put together an order for us to send all 10 for the same singular shipping price of about $50 from the UK.
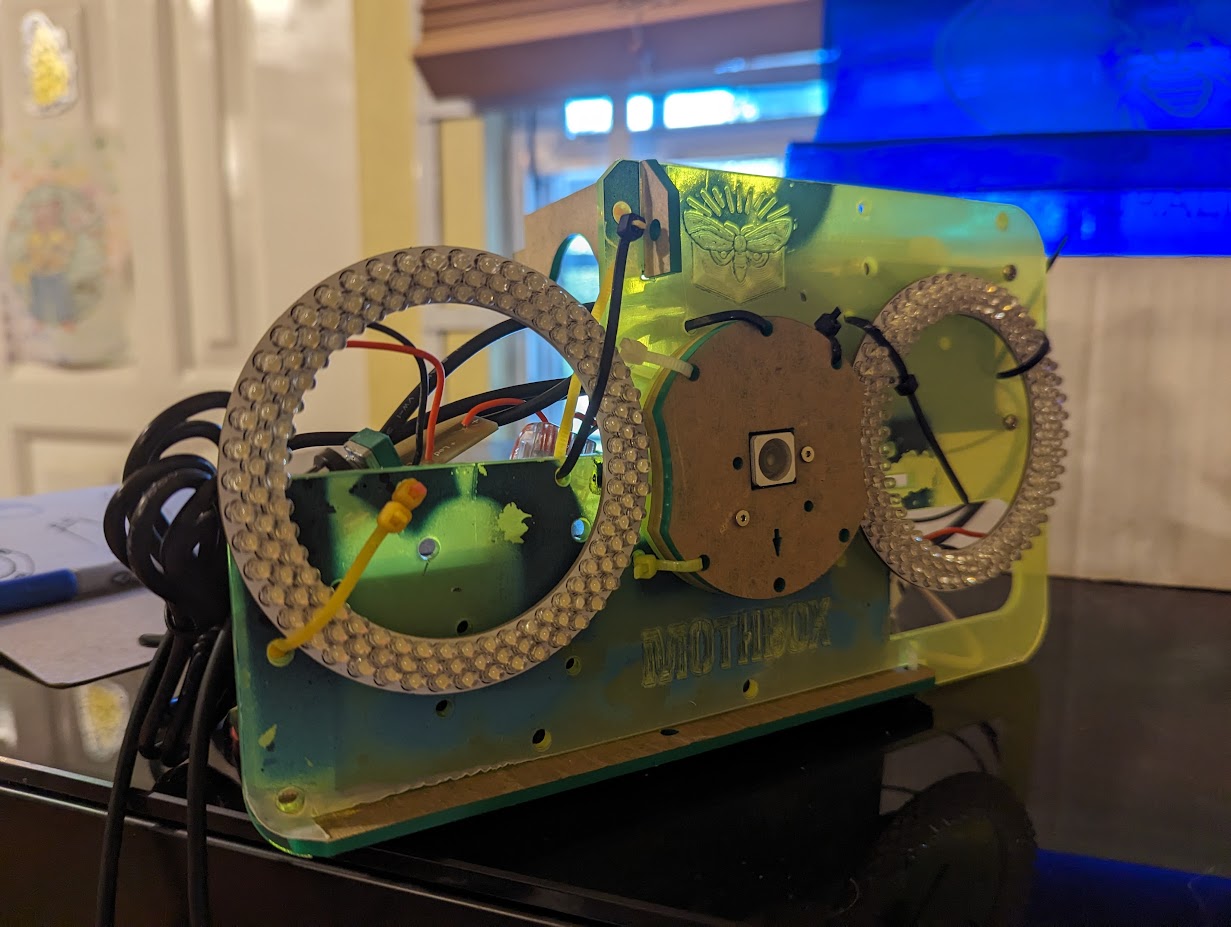
Dual Ring Lights
Probably the biggest last change we made in the design is doubling the amount of photography light.
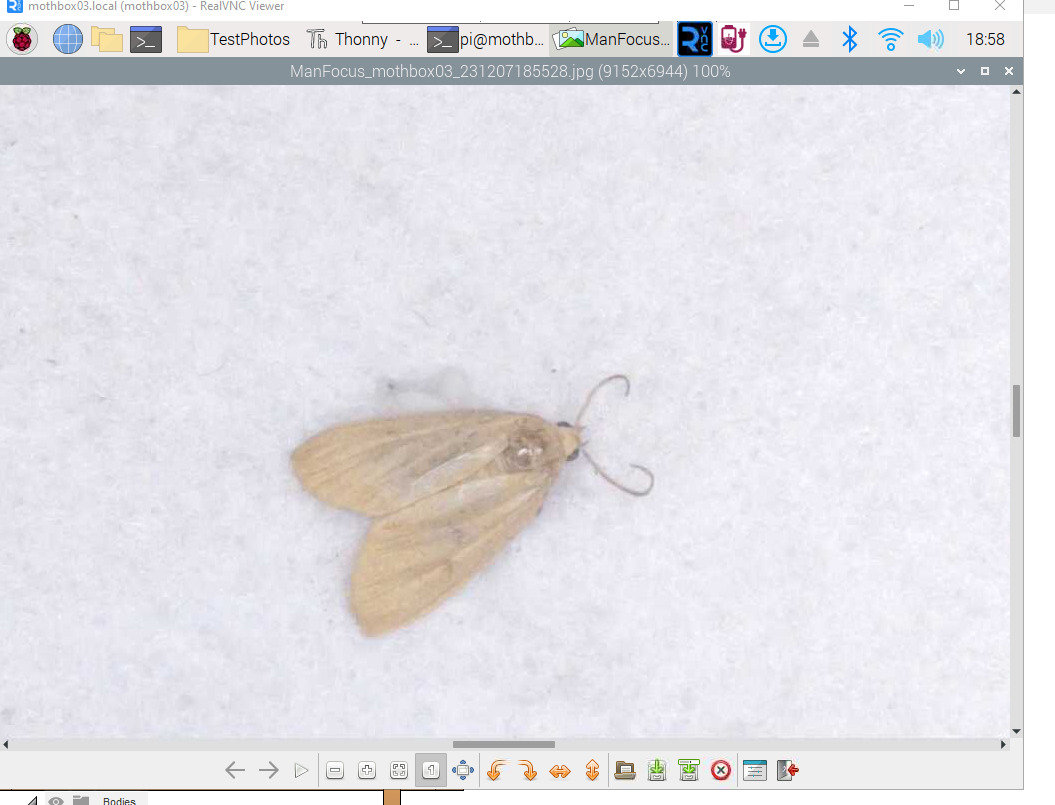
Originally the design was made to be carried by drones and supposed to be as light as possible. However, we noticed that the center of our target image would often be way overexposed, and the outside edges would be very dark. So i realized a way to make an option to connect two ring lights instead of 1 at the same time. This would help double the photons available in our image, and give better coverage to the target area as well. It would also be backward compatible with a single ring light design in case someone didn't have the budget for extra $24 ring lights in their designs.
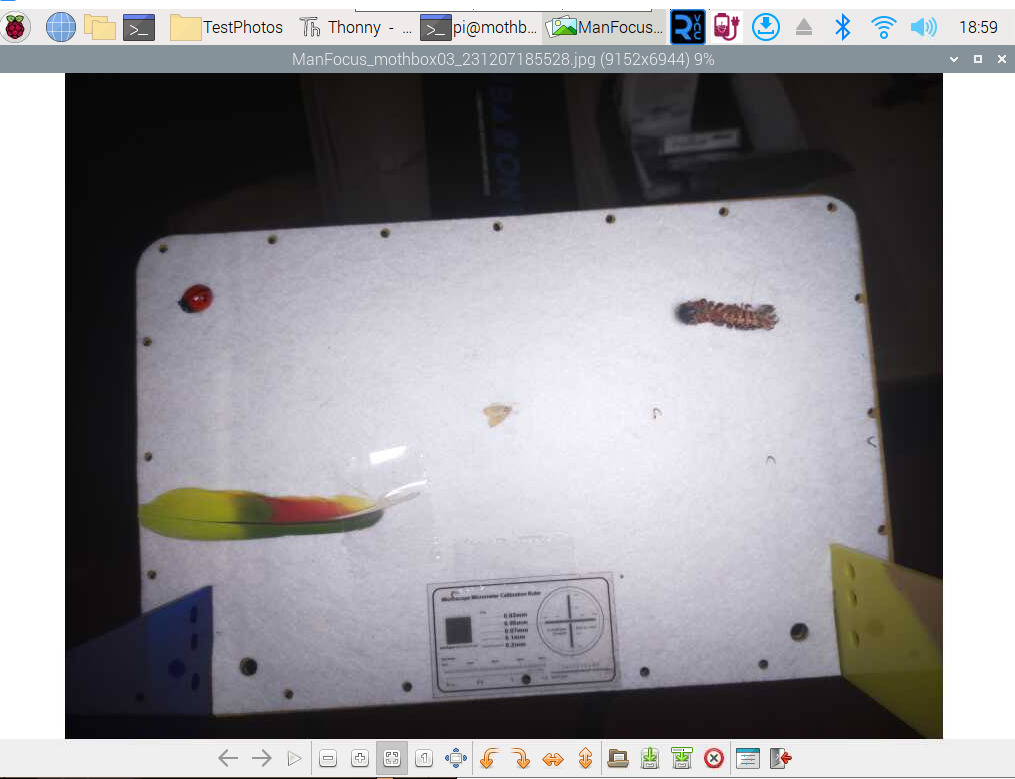
It's a bit hard to notice how stark the difference is between when we used 1 ring light vs 2, but when you zoom in on the insects it becomes very apparent.
Optimizing / Debugging Arducam 64mp
Raspberry pi has gone through a lot of changes in the past two months (new pi board, new drivers, new OS). Unfortunately for us this means a lot of stuff that worked in march, no longer worked in December! I had to open an issue over with Arducam (though they didn't really respond well) and Raspberry pi github, and an incredibly nice developer named David Plowman helped jump into the issue I had.
The Issue
The arducam 64mp camera was already pretty much at the edge of what the pi4 was able to do. And taking a 64mp photo programmatically in the normal way can take almost 30 seconds! The big problem for us was that even though our insects don't usually move that much in 30 seconds, we have to leave our photography lights on that whole time. Most of that time the camera isn't actually taking a photo, but rather doing things like starting up the camera, clearing the buffer for continuous space, etc... We needed to use the deeper functions available in the picamera2 library to control exactly when the camera takes a photo (vs starting up the camera or saving a photo). The problem was though that something happened with the new version of this camera library so that any 64mp images would cause too much buffer space to get used.
Long story short, me and david plowman fought this bug and figured out fixes,and he also taught me how to use special commands to make sure the rolling buffer was only getting pixels refreshed AFTER the light was turned on.
now instead of 20-30 seconds of leaving our photo lights on, we only need to turn the lights on for 1.8 seconds!
Big energy win there!
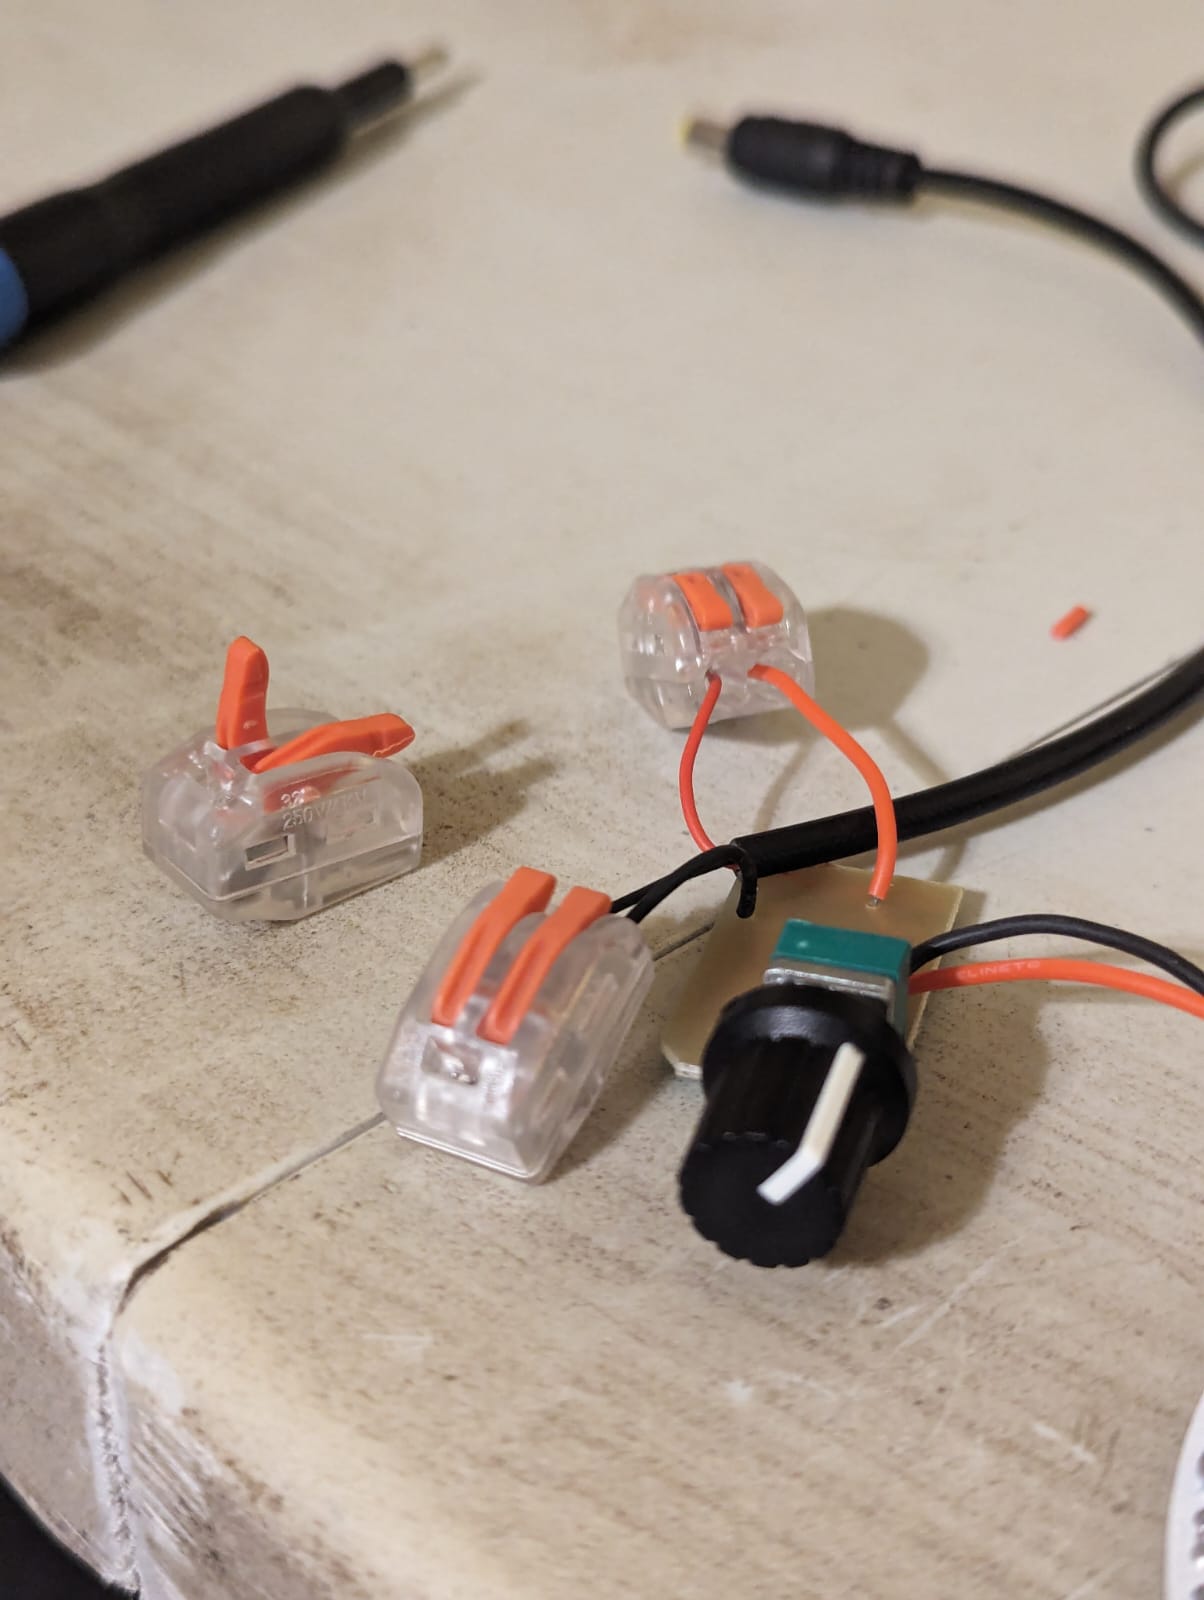
Wago for the Win!
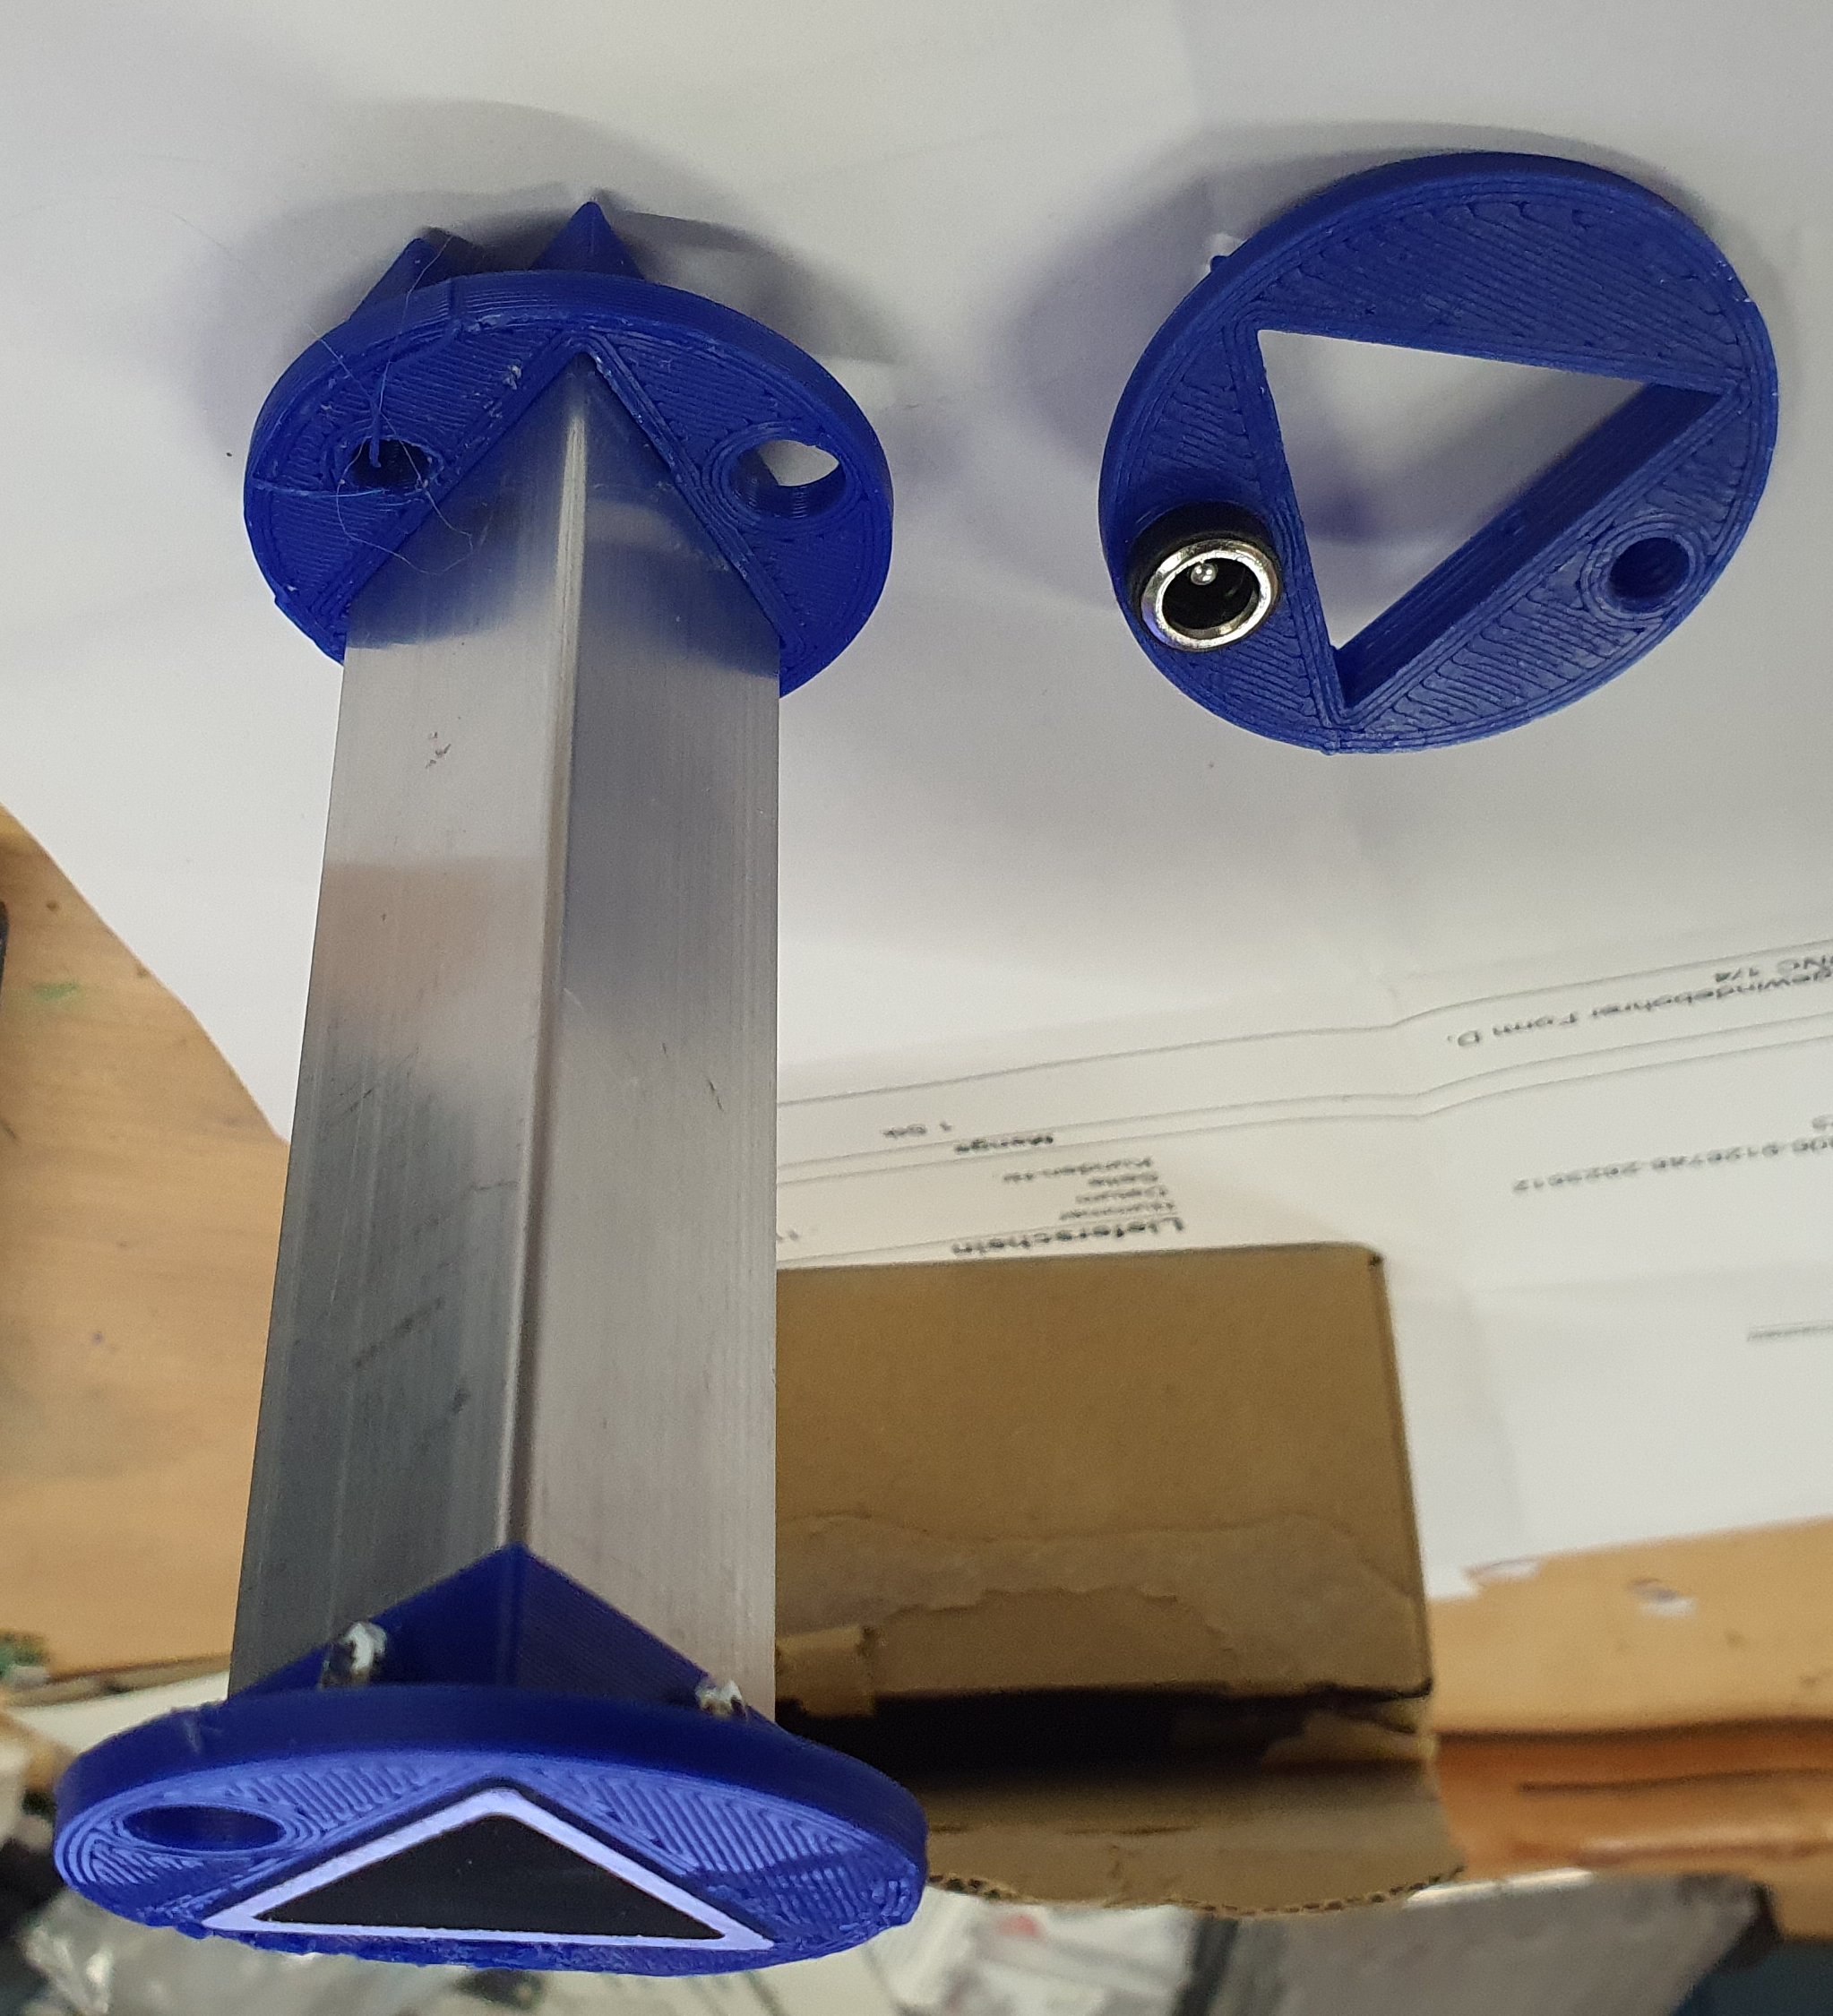
I started integrating some wago connectors into the design. These devices will be used in some communities and folks will get trained to use and maintain them. Soldering can often be intimidating or inaccessible in field sites. So instead I tested out some of these durable electrical connectors which seem to be some of the easiest ways to get a solid, reliable connection. There are things like twist-on wire connectors that are also easy, but can be easy to slide apart. These wagos (or cheap knock-offs that should be fine with our low-voltage system) are very simple and quite robust. Hopefully most electrical wiring can be undone and redone with just some connectors and a knife!
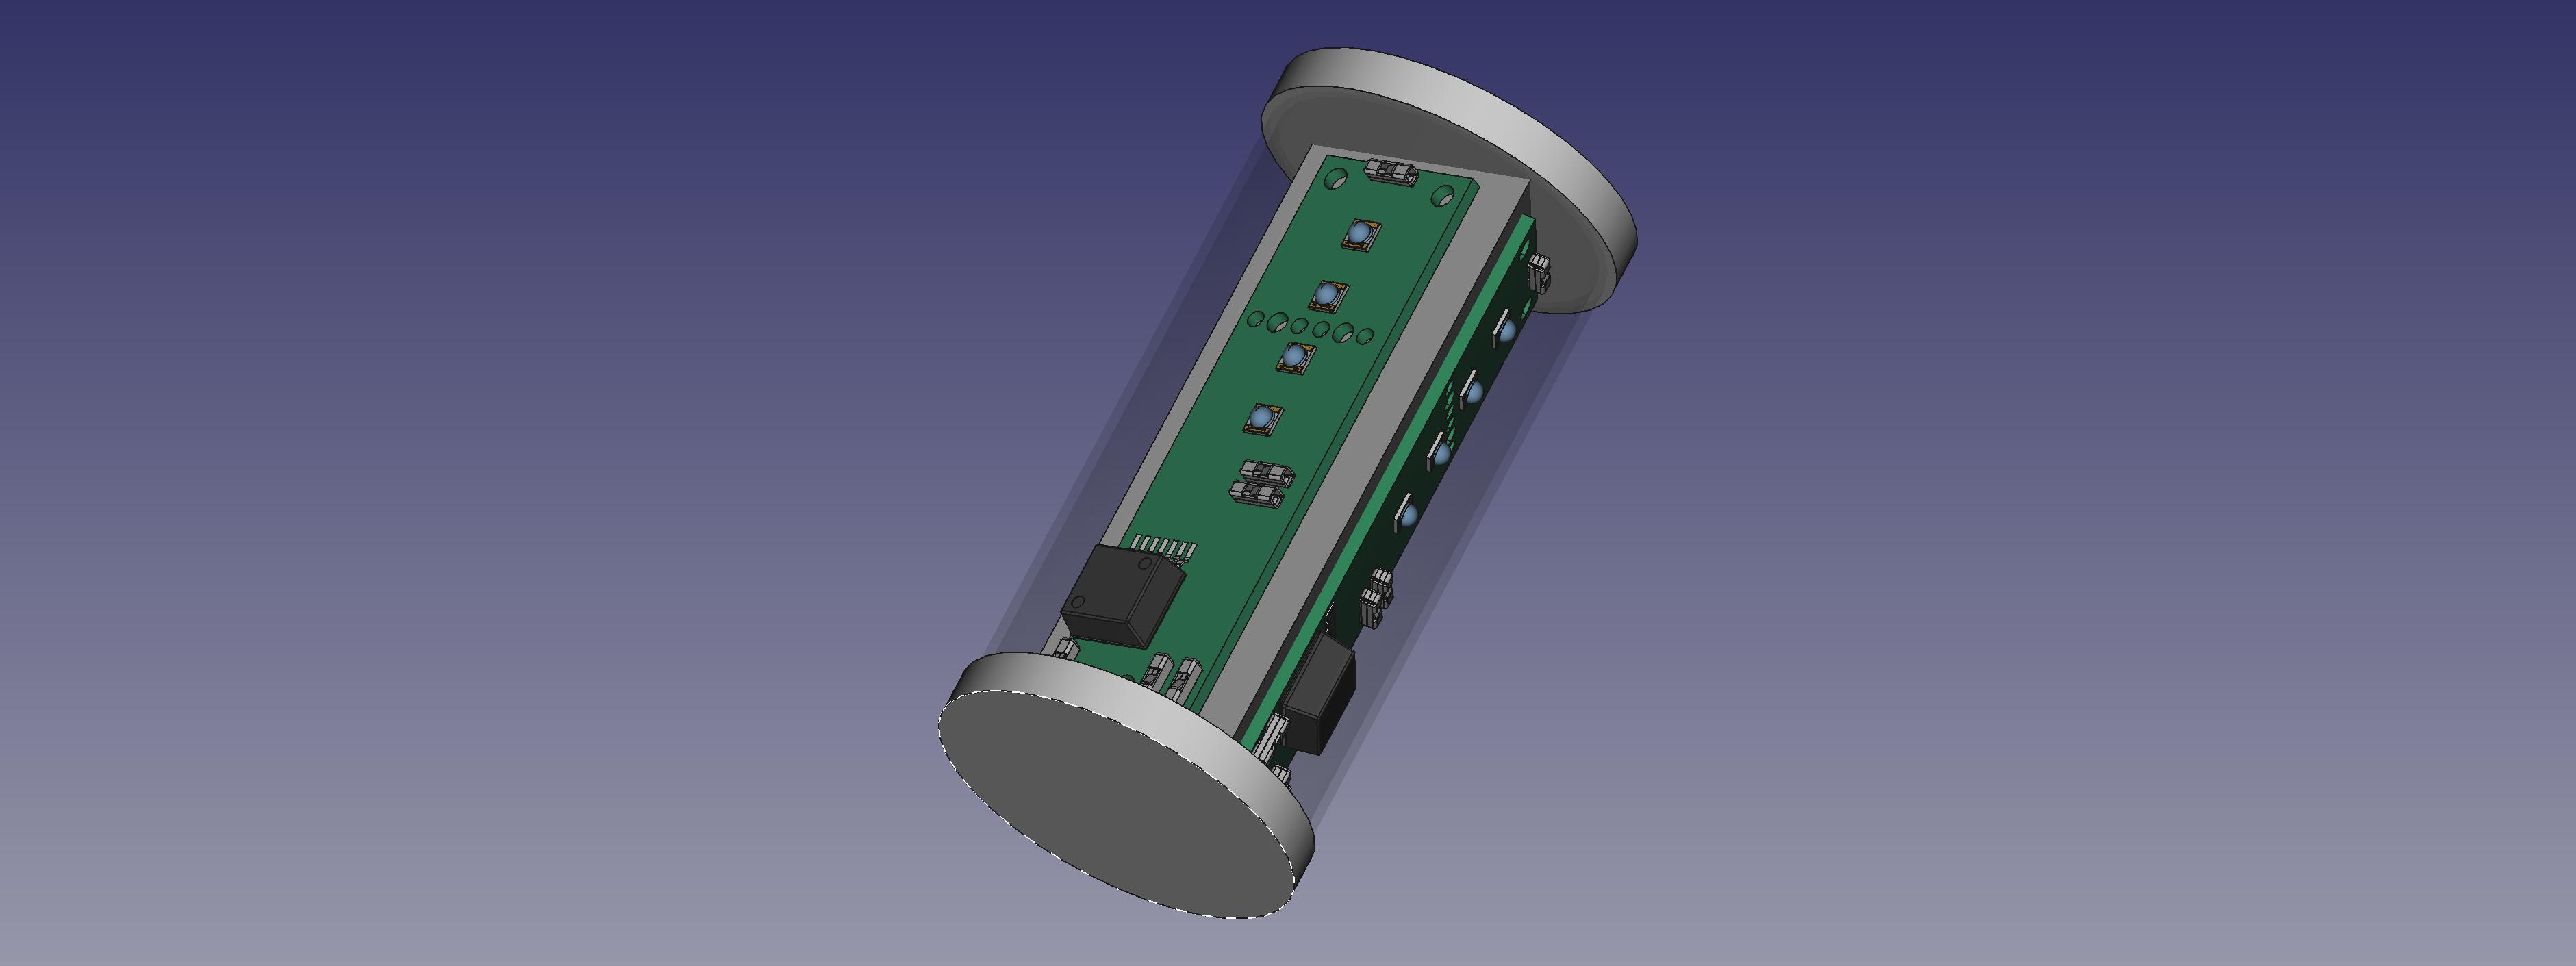
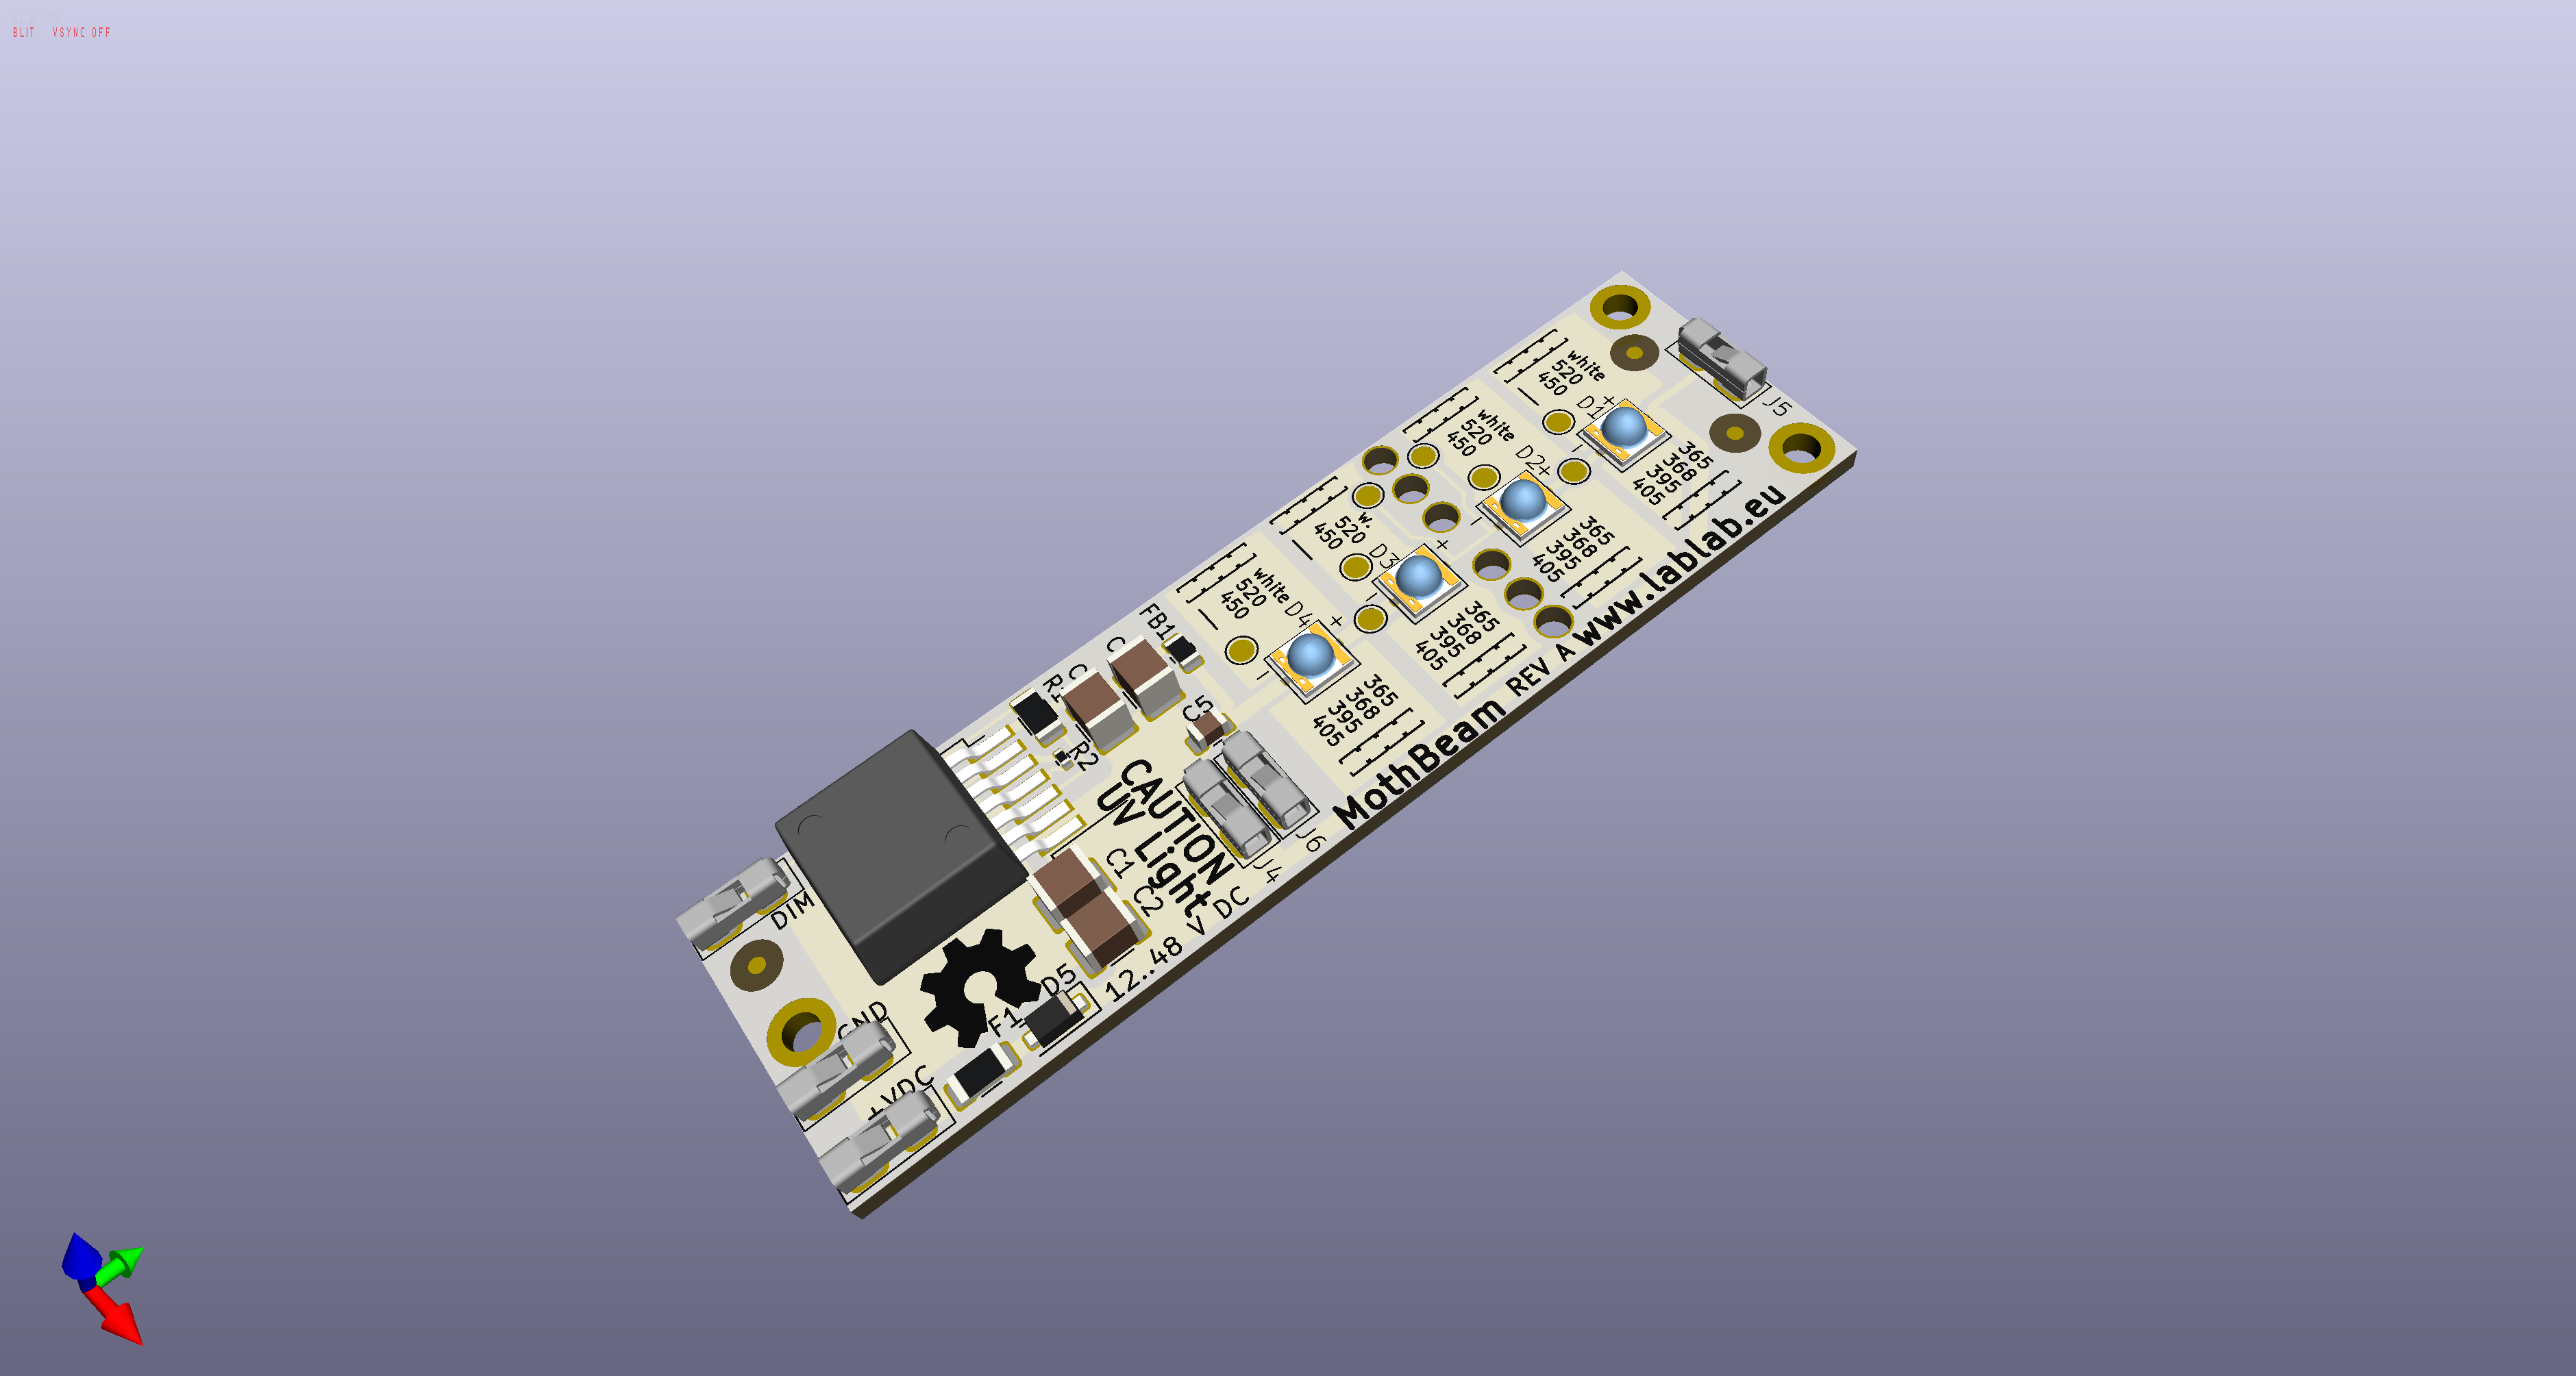
Mothbeam - custom open source inexpensive lepi-led like light designed by Moritz Buttlar
A final update (and SUPER COOL update) for the year is that the engineer Moritz Buttlar from LabLab in Germany saw our posts about the mothbox and wanted to know how he could help. He used to design large LED arrays for companies, and so i suggested that one thing he could work on is to see if he could make something that offered some of the performance of a lepiled (which are super cool and become more and more popular amongst scientists) at a fraction of the price.
He jumped into this challenge, and started working on a device right away! He's already producing some for us to test out! The main difference between it and a lepiled is that instead of a single very bright led, he uses several smaller leds to get approximately the same amount of light. It doesn't have the fancy glass cover of a lepiled or the nice machined parts, but instead uses some off the shelf tubing and 3D printed ends.
The main result is definitely not going to be something as super nice as the lepiled, but runs about $60 instead of $600 !
We aim to have some to play with in mid january!
1 January 2024 9:18pm
This looks amazing! I'm currently work with hastatus bats up in Bocas, it would be really interesting to utilize some of these near foraging sites. Be sure to post again when you post the final documentation on github!
Also, Gamboa......dang I miss that little slice of heaven...
Super cool work Andrew!
Best,
Travis


10 January 2024 11:33pm
Great work! I very much look forward to trying out the MothBeam light. That's going to be a huge help in making moth monitoring more accessible.
And well done digging into the picamera2 library to reduce the amount of time the light needs to be on while taking a photo. That is a super annoying issue!
Travis Bayer